
Hi everyone,
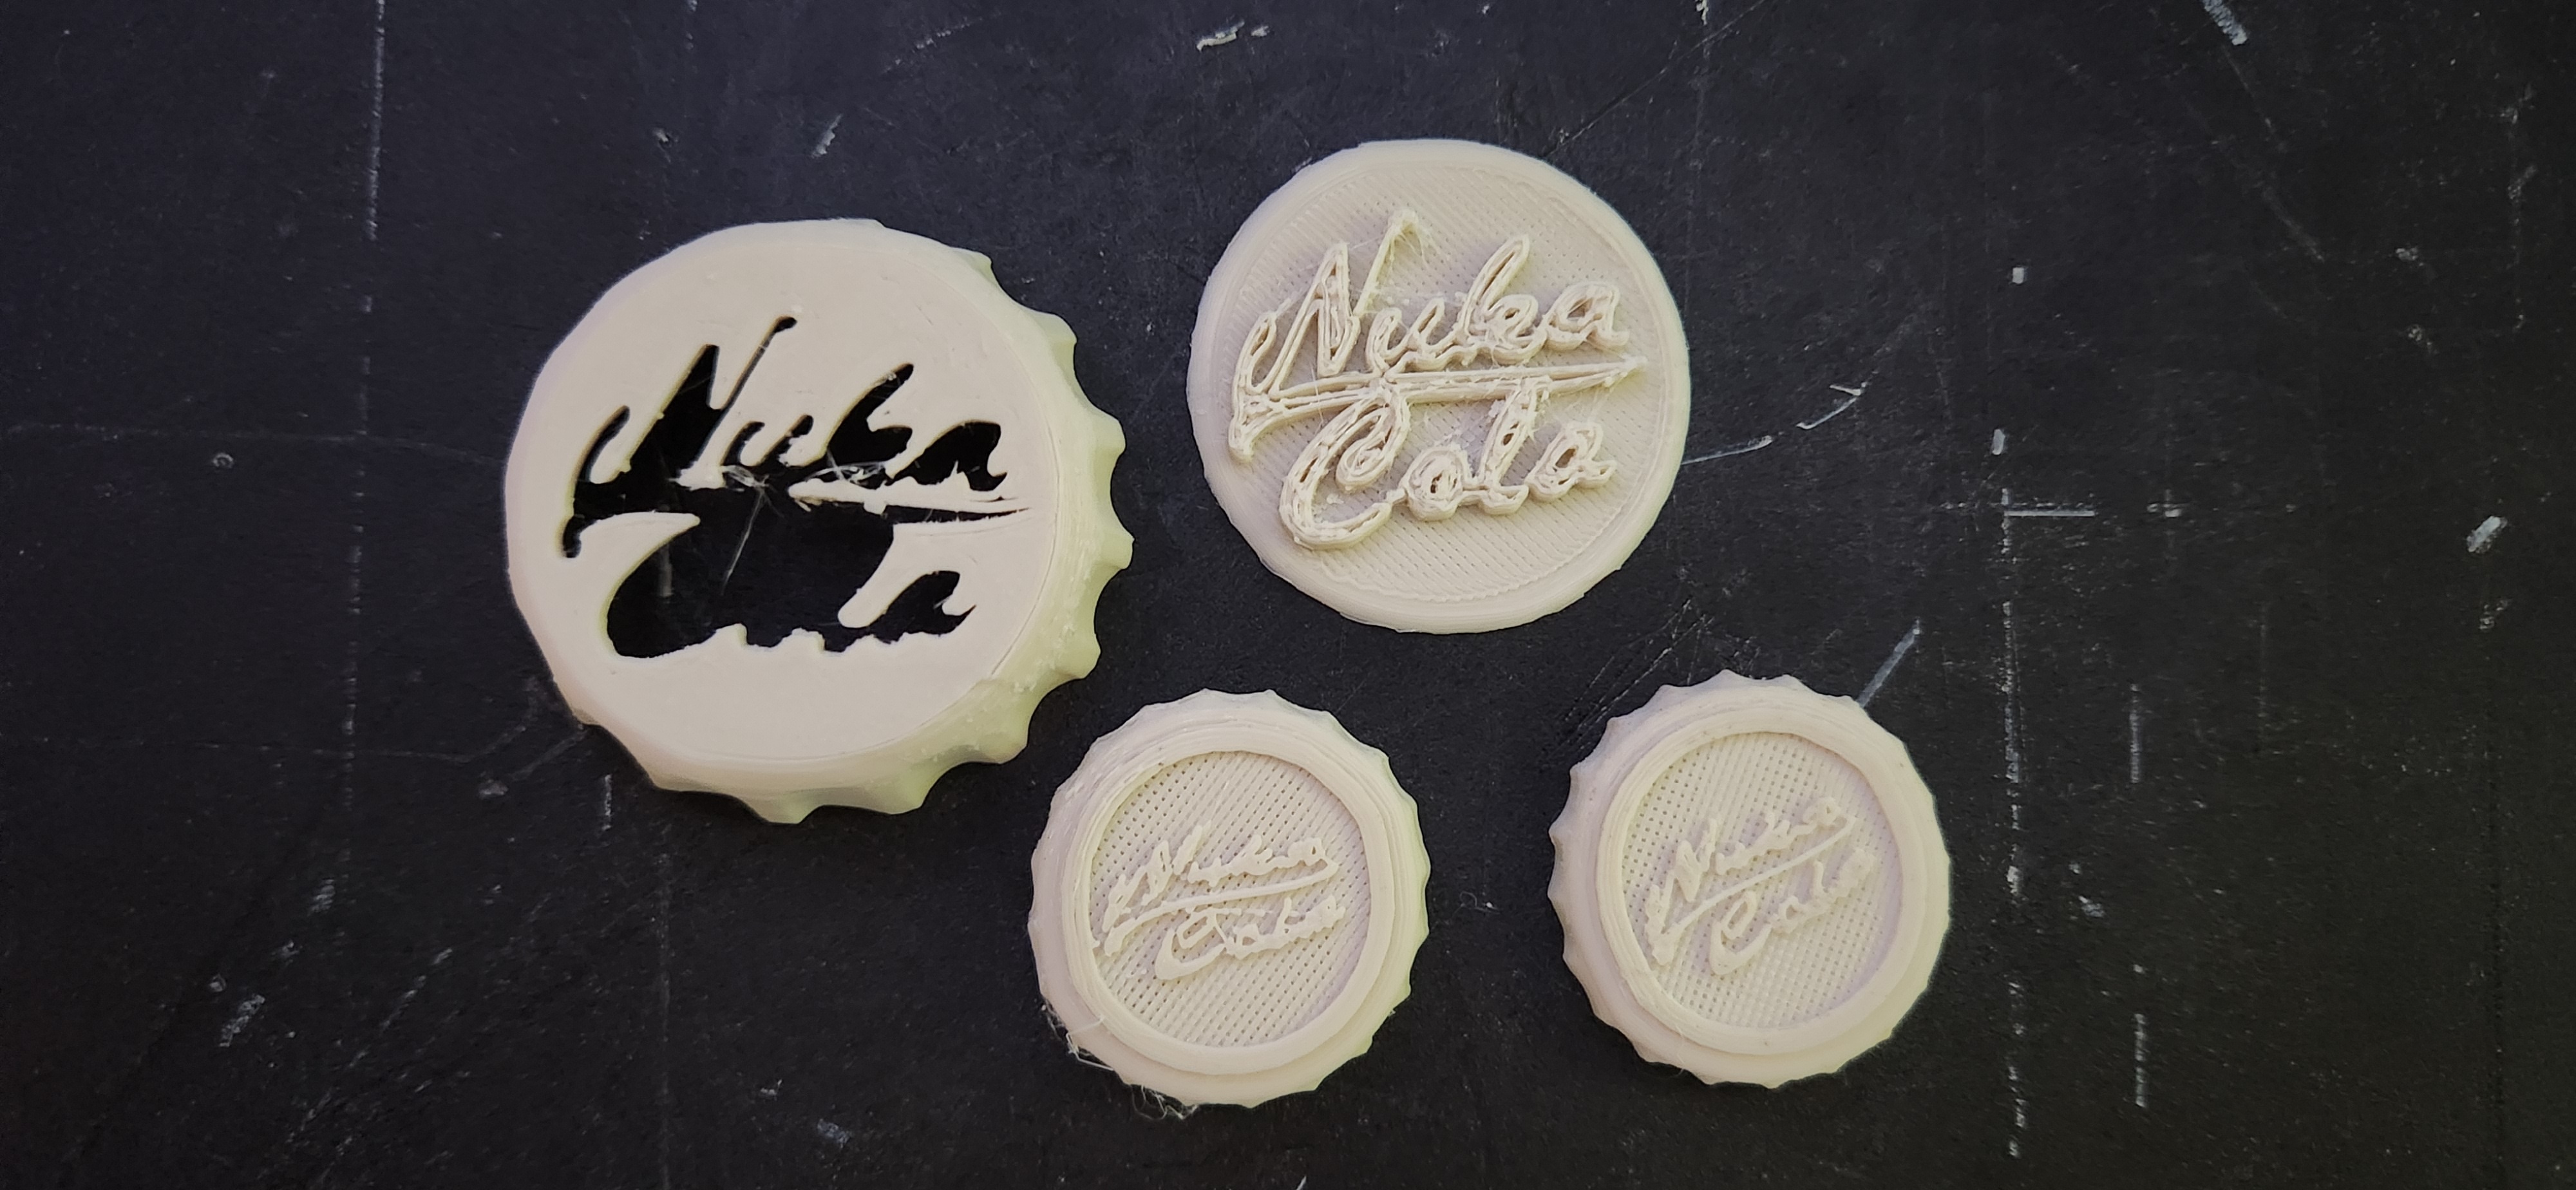
I’m having a weird issue with text such as the one in this image. Big or small, fancy or regular, all text comes out looking like it does in the image - cracked and hollow. I’ve spent the last few days trying to figure out why, and I’m stumped.
I’ve tried printing slower and slower and adding more and more top layers (the bottom 2 bottle caps are completely solid with 100% infil), but it doesn’t seem to fix the issue.
Here’s what I’m working with:
- Ender 3
- Software 2.0.8.27
- Hardware 4.2.2
- CR Touch
- PrusaSlicer 2.8.0
- MakerBot PLA Filament
- I’ve used various temperatures and speeds. All of them have generated the terrible text you see here
Thanks in advanced for the help!
Update: We seem to be getting somewhere!
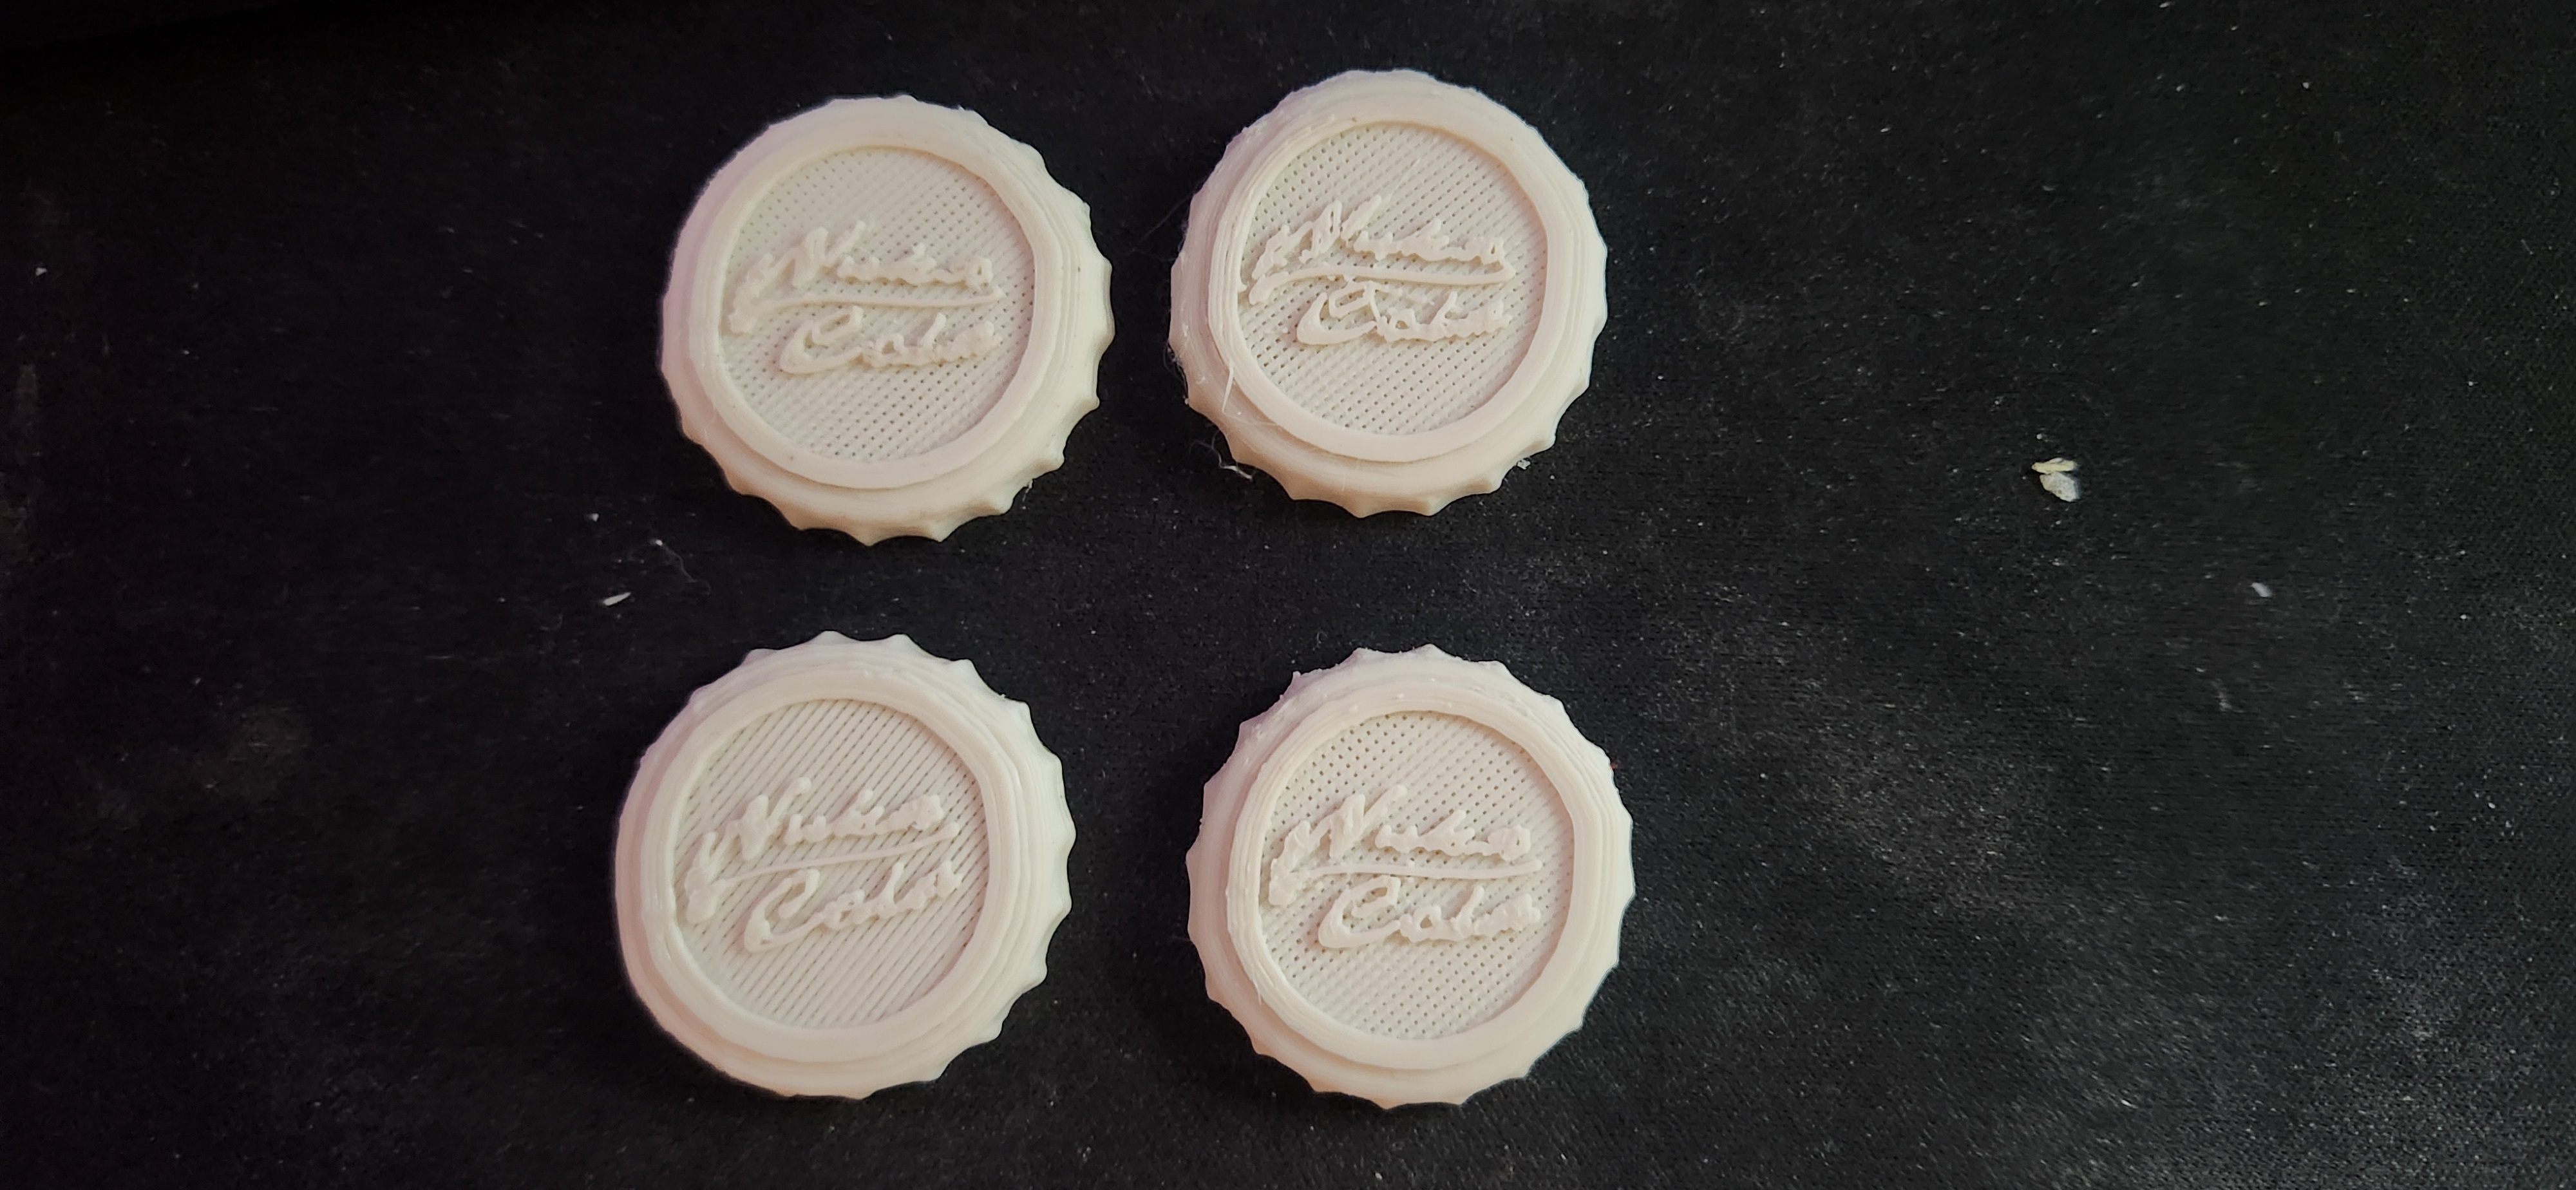
The top 2 are the same ones featured in the post above. The bottom left was printed at 110% extrusion and normal speed. The bottom right was printed at 110% extrusion and a much slower speed for the text, and it looks much better! I’m printing another now with higher bridge flow rate (it was 70%, I set it to 85%), so I’ll update again in a few minutes when that finishes!
Thanks for the information about calibrating e steps from everyone! It’s getting late, so I don’t want to mess around with that tonight, but I’ll give it a shot tomorrow!
Update 2: welp.

That’s possibly the worst one yet. I’m reprinting the bigger insert piece seen in the original post to check if my printer simply can’t do that quality or if it’s the e steps. If it’s e steps, I’m going to bed…
Update 3:
Welp, seems like it’s the e-step. However, it’s too late for me to care about that right now, so I’m going to bed. Thanks for the help everyone! I’ll work on fixing the issue tomorrow
So despite having this printer for a while, I’m unsure of what a few things you’ve asked.
First, the stuff I know how to answer:
The main thing I don’t understand is calibrating e-steps. I’m unsure of what an e-step is.
Thanks for the quick (and detailed!) reply!
For calibrating your printer, I always recommend https://teachingtechyt.github.io/calibration.html. Everything is step-by-step and helps teach you about the calibrations and what different settings do. I agree with the other commenter that you’re underextruding, based on your layers not filling in. Getting your E-steps calibrated is extremely important, then I’d start working on flow rates (which can change between rolls and brands)
You’ll want to google the exact steps for calibrating e-steps, but basically this is the setting that determines how many steps of the stepper motor are required to move the filament a given amount. You disconnect the bowden tube from the head, then push the filament through so a bit is exposed past the end of the tubing and mark exactly where the end of the tubing is on the filament. Now from your slicer you instruct the printer to extrude 100mm of filament, and very carefully measure how much actually comes out. If you have exactly 100mm then great, but typically you will find it off by a few mm (and in your case it’s probably less than 100mm). It doesn’t take much to cause a big problem. Any how-to page will show how you can read the current setting (I think it’s 92 steps by default), and there are formulas which will calculate the new number you need to change that to.
So the idea here is that if the slicer thinks it should be outputting 100mm of filament, but it only pushes 95mm instead, you won’t have enough filament to fill in the gaps. Setting the correct value on the printer will fix this, and then you can adjust more minor issues by changing the flow rate in the slicer. You will also note that different types or brands of filament extrude at slightly different rates, which is why your slicer may allow different profiles for the filament itself.
I’m not familiar with PrusaSlicer. Cura has always worked well for me, it’s free, and it provides quite a lot of options for fine-tuning your prints. If you find that Prusa doesn’t let you adjust the filament rate, give Cura a try.